Followers

Monday 5 August 2013

Easel card

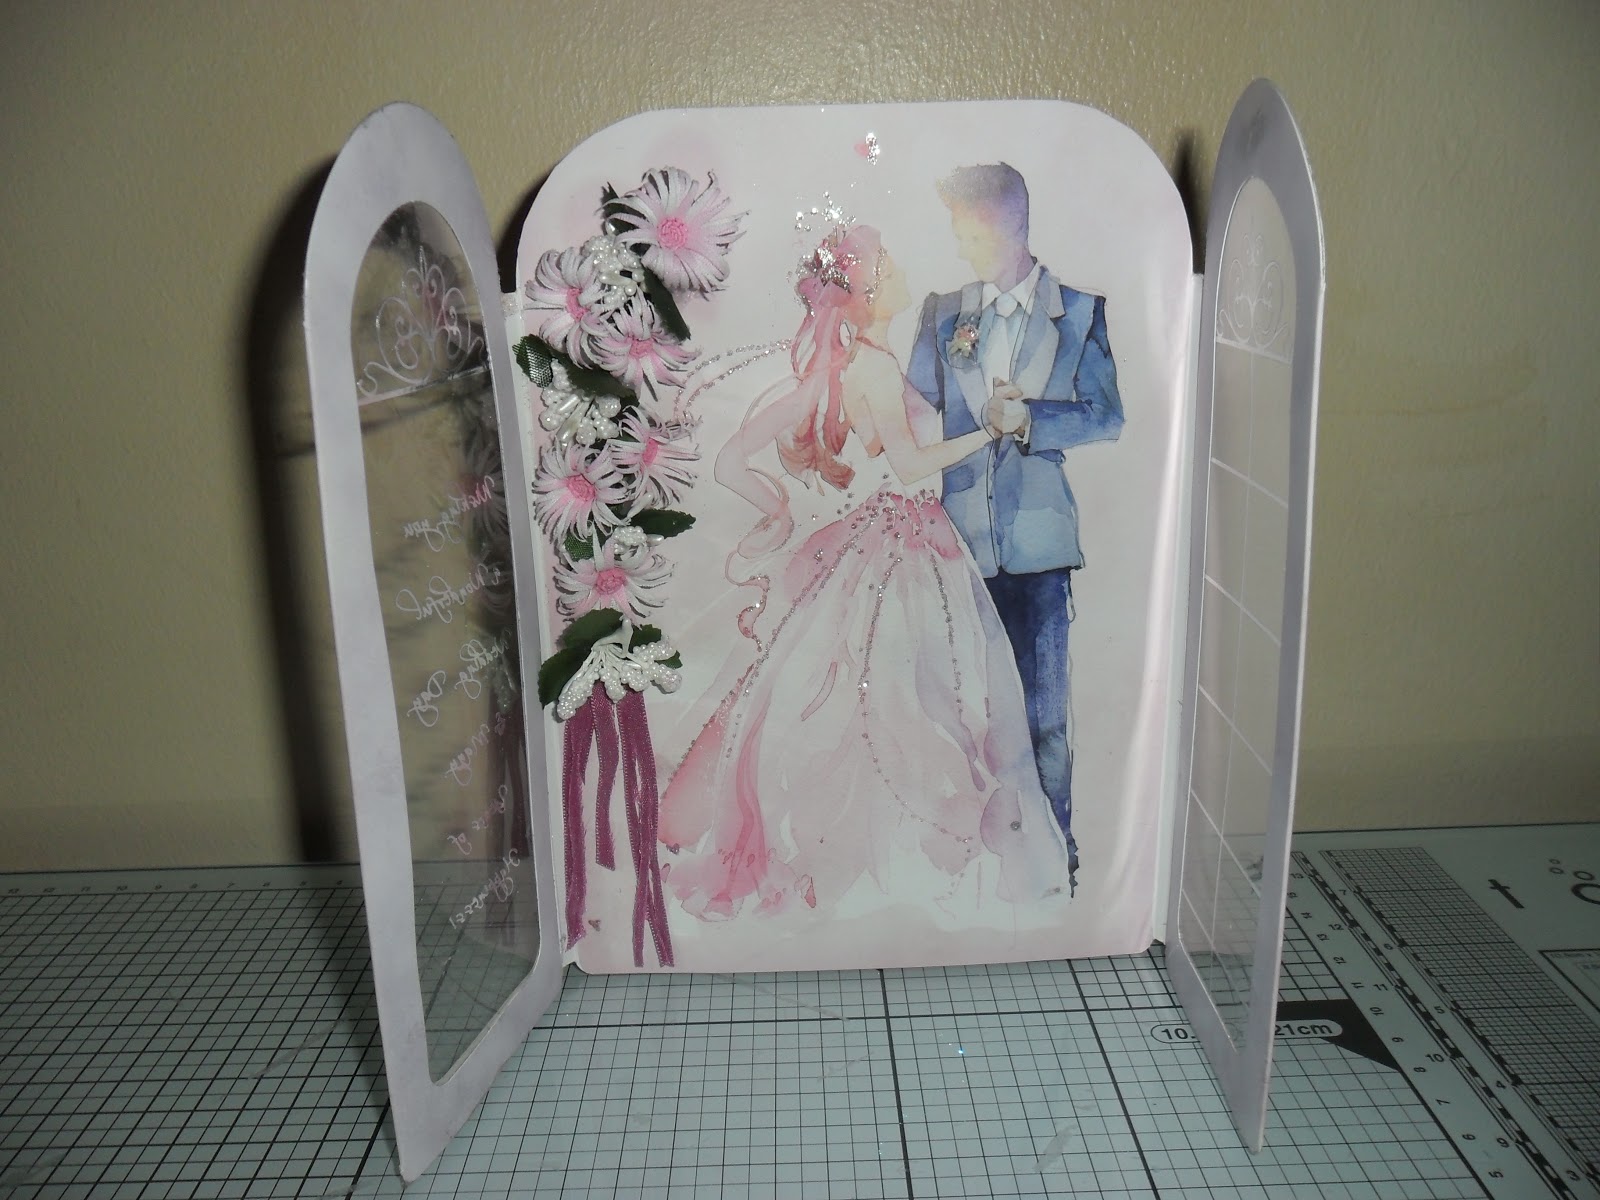
To make this card I used a white scalloped 300gsm card blank and folded the front half in half again, then took another scalloped card and cut it into two giving me one half for the front of my easel, the other half can be used to create another project.
 
Using the fairy kit that came free with Hunkydory's magazine, I matted and layered the bottom of base card with silver rainbow shimmer mirri card, then matted the pink silk art card which I cut slightly smaller than the mirri card to give a border showing just a small amount of mirri card around all edges. Using pinflair glue I then attached to the inside base of my blank easel. I used the same process for the front of the easel but attached the front to only one half of the base white card making sure I didn't stick the front to the back of the easel.
 
Next I made a stopper to prop my card up by making a ribbon strip with mirri card and co-ordinating card that matched my topper, I attached this ribbon strip along the base of the card half way up using foam pads to raise it so it held the front of my easel up. Done the same thing to make the ribbon strips for the main body of the easel but using glue gel to attach them to front of card.
 
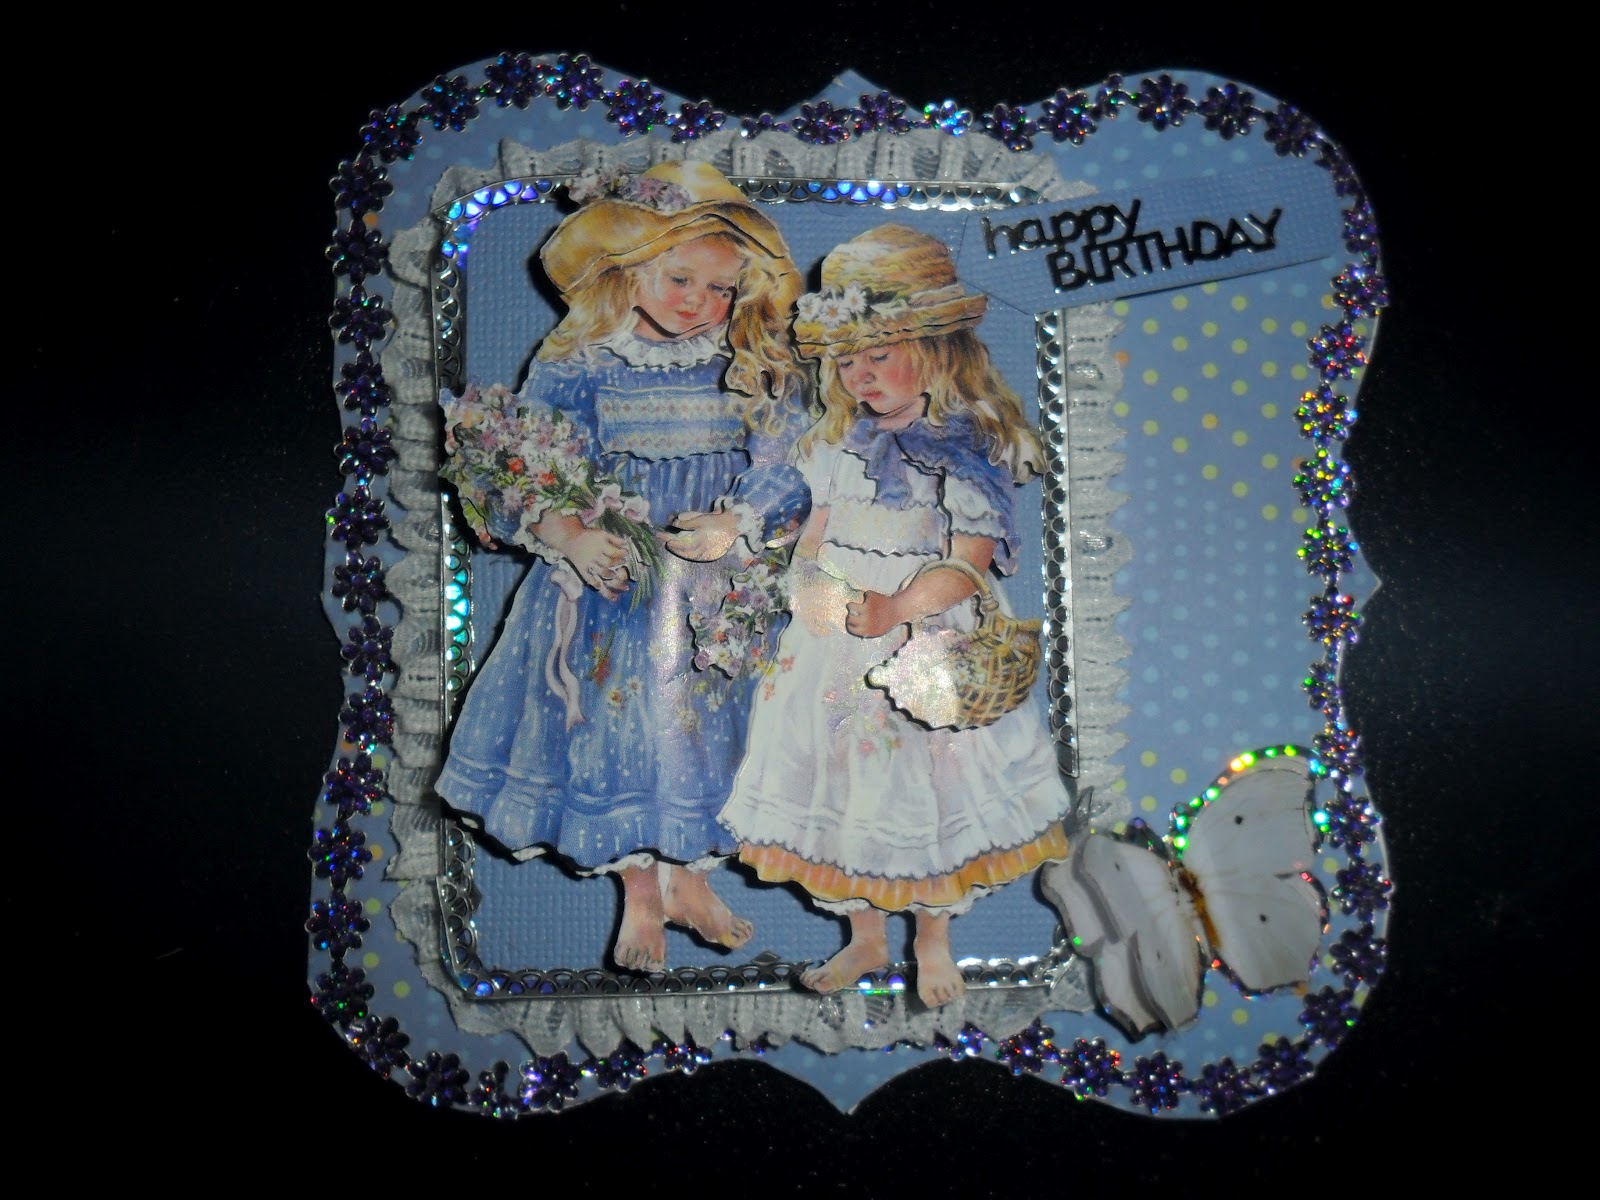
With the main image I wrapped lace around it that I bought from local haberdashery, I used extra strong tape and put it around the edges of the back of the base, by doing this I attached the lace with the seam behind the topper. Added foam pads to raise the height to the level of the lace, this also gives dimension to the topper when placed on front of easel card. I used a black ink pad to cover most of the white edges around the card as only wanted a tiny white border, I coloured the spots on the cup with a pro marker and added black stickers to give balance to the card, attached the topper and added pastel purple gems and a bow for decoration.
 
Hope you like and would love to read your comments, thank you in advance.
 
Hugs,
 
I intend on showing this on
 
and entering the challenges at 
  Anything goes
 
  Anything goes
 
Anything goes
 
Anything goes
 
Anything goes
 
Anything with scallops 
 
 
Xx


Saturday 4 May 2013

Aperture Card


This aperture card was sent in a goody bag swap from a group i am in on facebook called Creative Moments Craft Group, this is the link


At first glance it looked lifeless and dull so i chopped it in half and mounted the first side onto a card blank, chose brown with white dots paper for the background, cut the paper into an oval, then made a second oval but this time out of scrap paper i had in my stash, this one i inked around the edges with blending tool stamped a sentiment and used embossing powder and heated using heat tool. Added flexi peel offs around the outside aperture and also the middle aperture.

It already had swirls on the card but they didn't stand out very much so from the same goody bag i inked some swirls that came in it and added embossing powder then heat set it. The stars were already printed on the card so i added pinflair glaze to give them a glossy finish.

Added and placed two die cut butterflies which had been dipped in copper tones glitter and in the bottom corner added the rose also from goody bag swap, before attaching i sprayed the rose with spray and sparkle from crafters companion, added the leaves and attached with silicone glue. I inked the top right corner to blend in with the rest of the card and added gemstones to finish off.

Would love to know what you think all comments greatly appreciated.

I would like to enter this on

http://allsortschallenge.blogspot.co.uk/

And show it on

http://ppp-makeitmonday.blogspot.co.uk/2013/05/mim-139-with-saturated-canary.html

And join in the fun at

http://paper-craftingjourney.blogspot.co.uk/2013/05/anything-goes.html

Happy Crafting,


xx


Wednesday 1 May 2013

Easel Card


This Easel Card is for a swap in a group i am in, link below


The shaped card is from Kanban i used one full one and one half of another, scored and folded the first full card across the middle where the points are, then attached the half card to the one i had scored but only attached from the score line to the bottom of the card. Covered top panel and the bottom panel with backing paper cutting the shape out from the back, butting scissors up to the shaped card give's a neater finish. I added a border strip along the bottom for a stopper to keep easel upright.

The topper is from the Lovely Ladies collection brought to us by Hunkydory, added flower soft to the flowers to give texture then using super sticky tape i wrapped it around the back off topper and attached the lace to frame it. Used sticky pads and positioned it in the centre of the card, added rhinestones for interest.

Would love your comments good, bad or constructive to help me improve on my work.


Happy Crafting


xx


Saturday 27 April 2013

ATC Theme Sewing


This is an atc that i made for a swap in a group that i am in called A Crafters Heaven, this is the link


We chose our own theme so i decided to make my ATC about Sewing.

I cut a piece of card to 2.5 x 3.5 then covered with coloured paper from the Peter Rabbit collection, i cut that to the same size and used a wet glue to attach to my piece of card. The four corner pieces were scraps that was left from a card kit i had from Hunkydorey and attached with wet glue again, using wet glue gives you a few moments to place exactly where you want it as it does not bond instantly.

The image is from the Peter Rabbit collection also. Popped the die cut pieces out, moulded them in the palm off my hand to give the pieces some shape, decoupaged the image using blobs of silicone glue this gave height and helps to give dimension to the image when i attached to the ATC, then added gem stones which i had in my crafty stash.

Would love to see your comments whether they are good, bad or constructive as they can all help to improve my work. Thank you in advance.

Happy Crafting

I intend on showing this on Make it Monday

http://ppp-makeitmonday.blogspot.co.uk/  


XX

Saturday 20 April 2013

Wedding Card


This is from the old version of Wndows To The Heart by Hunkydory, this is the link if you wish to visit.


It came pre scored so i only had to fold the pre scored card and burnish using a bone folder tool. I chose this image and added glitter that was in my stash. the accitate which has the sentiment on was added to the side panels, a wet glue was used to position the panels together this gave me movement to get the panels central. Attached the beautiful image to the middle of the card using double sided tape.

The flowers were bought from a well known cheap shop, i arranged them down the side of the inside back panel using pinflair glue gel as it is a good glue to hold the weight of the flowers, then added some pink ribbon to the bottom of the arrangement.

Would love to read your comments and don't mind constructive criticism either as its all a learning curve.
Happy Crafting x

Thursday 18 April 2013

On Your Special Day


First of all would like to give my followers an apology as i have not been around for a long time.

This is a card i made for someone in a group i am in called, A Crafters Heaven, this is the link if you wish to visit.


I cut the heart shape and the sentiment using the Mini Cricut basic shapes which come pre loaded with the machine. I used mat mirri card 250gsm, and scored down the middle, folded in half and this gave me the shape.

For the embelishment's i used feathers, two little rosebuds with leaves from my stash and a flower made out organza ribbon, all were attached using pinflair glue gel, then added pastel pink gems also from my crafty stash. I cut out two butterflies from some paper that i had and used one on the front of card the other was for the inside to embelish the insert, used pinflair crafting glaze, this gave a nice glossy finish to them, moulded them into shape to give them some dimension and again attached using pinflair glue gel.

Would like to thank you for having a lookie and your comments good, bad or constructive would be most welcome.

I would like to show this on Make It Monday

http://ppp-makeitmonday.blogspot.co.uk/

Crafty Hugs                           


x

Saturday 25 August 2012

Paintbox Poppets

 
Paintbox Poppets brought to us by http://www.crafterscompanion.co.uk/ and for the outstanding art work, credit goes to Christine Haworth, it is a privelege to craft with these beautiful images, thank you.
 
I intend on showing this in http://www.panpasteluk.blogspot.co.uk/ the theme decoupage.


Saturday 28 April 2012

Best Wishes On You Birthday


This is a card made from Peter Rabbit collection brought to us by


I used a pre scored round scalloped edge card blank, 350gsm from Kanban then using a circle compass i cut background paper into a circle. Using Tim Holtz distress inks i blended 2 colours onto the card, background paper and topper using my blending tool to give it that distressed look. I decoupaged the topper image (frog reading paper) moulded it by hand to give dimension, using pinflair glue gel to attach. The topper was attached with foam pads just to raise it slightly.

For the sentiment i used a die cut image from same collection and distressed that as well, used foam pads to give a bit off dimension to my sentiment then i stamped the distress ink onto craft sheet spritz the ink then mopped it up by using textured ribbon. Faux gems were added for a bit off interest and it helps to balance it all out.

I hope you like and please if you make a comment sugestions on how i can improve on my design would be appreciated.

I intend on entering this into


Crafty (hugs) x


Friday 13 April 2012

Easter


This is an Easter card made for A Crafters Heaven on ebay using hunkydory kit.

crafty (hugs) x